Sending Messages
Table of Contents
Getting Started
- How to Start Sending Messages
- Send in Test Mode
- Sending Options Overview
- Email Authentication & DKIM
Sending Methods
Advanced Delivery Controls
- Scheduling Delivery
- Sending with Send Time Optimization (STO)
- Sending with Time Zone Optimization (TZO)
- Sending an AMP Message
Message Customization
Templates & Mailing Lists
Infrastructure & Delivery
How to Start Sending Messages
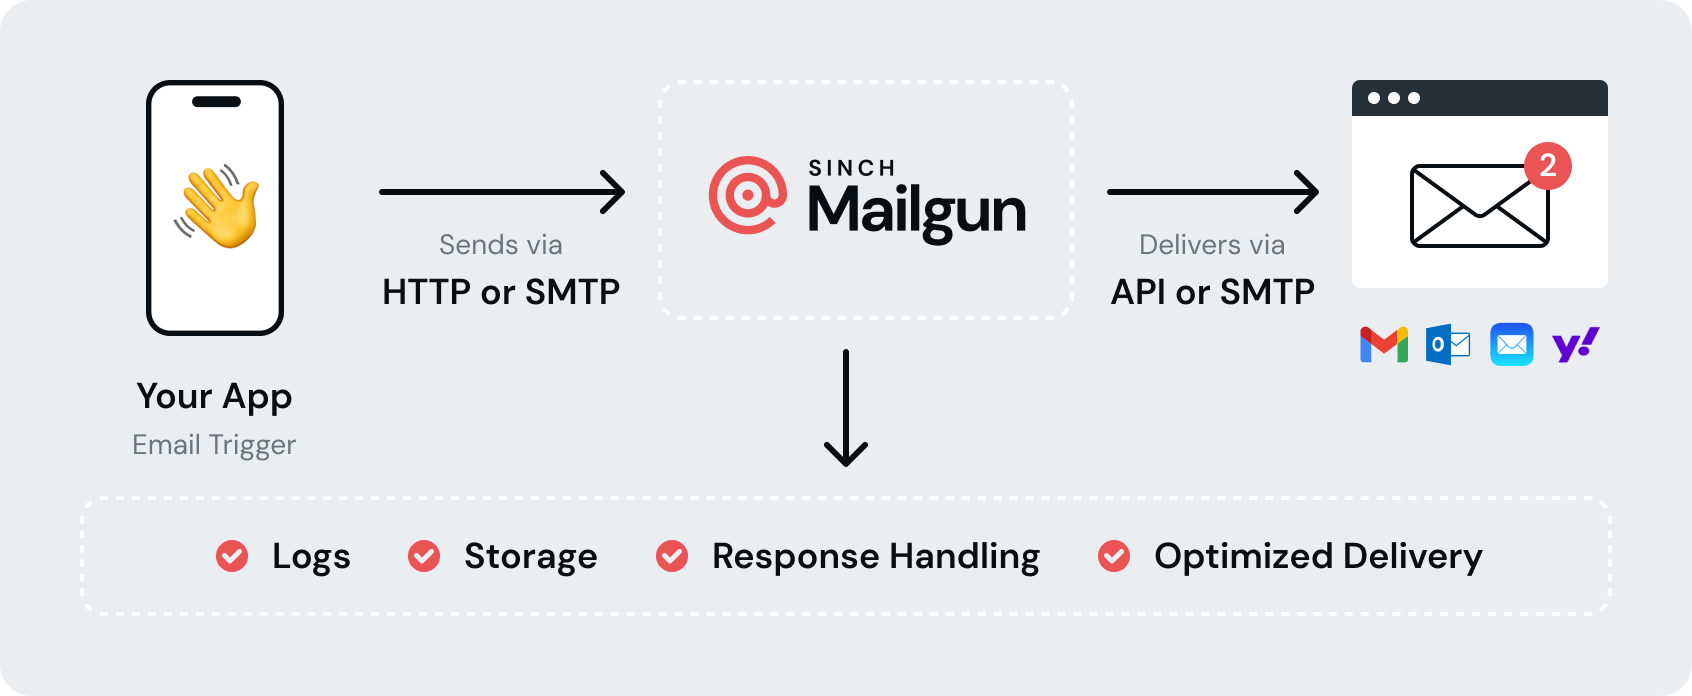
There are two ways to send emails using Mailgun's platform that work great to support the same feature set.
Both sending methods support the same sending options
Choose the one you'd like to use based on your preferences and requirements.
Note:
Since Mailgun does not host mailboxes, our service does not use the POP or IMAP protocols.
Send via HTTP
When sending an email via our HTTP API, Mailgun offers two options:
- You can send a pre-built MIME. This assumes you've built an RFC-compliant MIME in your choice of tooling
- You can use our HTTP API to submit the individual parts (text, HTML, attachments, etc.) of your messages to Mailgun.
Some things to consider when sending emails with Mailgun:
- If your domain exists in our EU region be sure to substitute “ https://api.mailgun.net” with “ https://api.eu.mailgun.net”
- The maximum message size Mailgun supports is 25MB
-
An error will be returned with
"parameter is not a valid address"if the provided email address fails syntax checks in accordance with RFC5321, RFC5322, RFC6854 -
Mailgun supports receiving GZIP-compressed HTTP bodies if the
Content-Encoding: gzipheader is present- Bodies must be gzip-compressed as defined by RFC1952
- Compressing message bodies does not bypass the above limit. This limit is enforced on the uncompressed body
- Mailgun does have rate limits in place to protect our system. In the unlikely case you encounter them and need them raised, please reach out to our support team.
We understand email is complicated, and have provided many options to tailor your request to your personal needs. Please see all our sending options here!
Here are a few examples to get you familiar with interacting with the API (using cURL)
Sending Basic Text
Sending a simple text-based email using Mailgun's HTTP API requires a few parameters at minimum:
curl -s --user 'api:YOUR_API_KEY' \
    https://api.mailgun.net/v3/YOUR_DOMAIN_NAME/messages \
    -F from='Excited User <postmaster@YOUR_DOMAIN_NAME>' \
    -F to=recipient-1@example.com \
    -F to=recipient-2@example.com \
    -F subject='Hello there!' \
    -F text='Testing some Mailgun awesomeness!'
What actually happened:
- Mailgun assembled a valid MIME message based on your input parameters
-
Delivered the email to both recipients listed with the
toparameters - Added log entries to our full text index that we Accepted the email, and if delivered successfully, added a Delivered event. (See the Events API for more details)
Send With Text and HTML Versions
By including both the 'text' and 'html' parameters, you can offer two different versions of your email to the user:
curl -s --user 'api:YOUR_API_KEY' \
    https://api.mailgun.net/v3/YOUR_DOMAIN_NAME/messages \
    -F from='Excited User <postmaster@YOUR_DOMAIN_NAME>' \
    -F to=recipient@example.com \
    -F subject="Hello there!" \
    -F text='This will be the text-only version' \
    --form-string html='<html><body><p>This is the HTML version</p></body></html>'
Note:
A common gotcha: note the use of --form-string in this example for the HTML part. Without this, your
cURL command may fail to execute properly!
Send a Single Message With Tracking
While tracking can be enabled for all messages in your Dashboard, you can also selectively enable tracking on a per-message basis. To enable all tracking types you use the 'o:tracking="yes"' parameter. Otherwise, you can enable only specific tracking for opens ('o:tracking-opens') or clicks ('o:tracking-clicks'):
curl -s --user 'api:YOUR_API_KEY' \
    https://api.mailgun.net/v3/YOUR_DOMAIN_NAME/messages \
    -F from='Excited User <postmaster@YOUR_DOMAIN_NAME>' \
    -F to=recipient@example.com \
    -F subject="Hello there!" \
    -F text='Testing some Mailgun awesomeness!' \
    -F o:tracking-opens="yes"
Send with Attachments
curl -s --user 'api:YOUR_API_KEY' \
    https://api.mailgun.net/v3/YOUR_DOMAIN_NAME/messages \
    -F from='Excited User <postmaster@YOUR_DOMAIN_NAME>' \
    -F to=recipient@example.com \
    -F subject="Hello there!" \
    -F text='Testing some Mailgun awesomeness!' \
    -F attachment=@tps-report.txt \
    -F attachment=@cover-letter.txt
Send with metadata
When sending messages, you can attach data for later retrieval.
curl -s --user 'api:YOUR_API_KEY' \
    https://api.mailgun.net/v3/YOUR_DOMAIN_NAME/messages \
    -F from='Excited User <postmaster@YOUR_DOMAIN_NAME>' \
    -F to=recipient@example.com \
    -F subject="Hello there!" \
    -F text='Testing some Mailgun awesomeness!' \
    -F v:my-variable='my-value'
Send Template with variable substitution
Not all templates use variables, but assuming it has variable called "name". Note, the variables will be hidden from the MIME and not show in events.
curl -s --user 'api:YOUR_API_KEY' \
    https://api.mailgun.net/v3/YOUR_DOMAIN_NAME/messages \
    -F from="Excited User <postmaster@YOUR_DOMAIN_NAME>" \
    -F to="recipient@example.com" \
    -F subject="Mailgun is awesome" \
    -F template="My Great Template Name" \
    -F t:variables="{\"name\":\"Foo Bar\"}"
Send a Customized Batch Email
Batch messages are a great way to send emails to multiple people, while still being able to customize the content for each recipient.
curl -s --user 'api:YOUR_API_KEY' \
    https://api.mailgun.net/v3/YOUR_DOMAIN_NAME/messages \
    -F from="Excited User <postmaster@YOUR_DOMAIN_NAME>" \
    -F to="recipient@example.com, recipient-two@example.com" \
    -F subject="Mailgun is awesome" \
    -F text="Hello %recipient.fname% %recipient.lname%! Enjoy a free %recipient.gift%" \
    -F recipient-variables="{\"recipient@example.com\": {\"fname\":\"Bob\", \"lname\":\"Mailgun\", \"gift\":\"high five\"}, \"recipient-two@example.com\": {\"fname\":\"Foo\", \"lname\":\"Bar\", \"gift\":\"fist bump\"}}"
Send With Specified Delivery Time
The 'o:deliverytime' option allows you to specify when an email should be sent. It uses RFC822 date formatting and can be no more than 3 days in the future:
curl -s --user 'api:YOUR_API_KEY' \
    https://api.mailgun.net/v3/YOUR_DOMAIN_NAME/messages \
    -F from='Excited User <postmaster@YOUR_DOMAIN_NAME>' \
    -F to=recipient@example.com \
    -F subject="Hello there!" \
    -F text='Testing some Mailgun awesomeness!' \
    -F o:deliverytime='Fri, 14 Oct 2011 23:10:10 -0000'
Note:
If your billing plan supports 7 or more days of storage capability, you can schedule emails out up to 7 days.
Send using Tags
Mailgun allows you to Tag emails for further analytics within our platform:
curl -s --user 'api:YOUR_API_KEY' \
    https://api.mailgun.net/v3/YOUR_DOMAIN_NAME/messages \
    -F from='Excited User <postmaster@YOUR_DOMAIN_NAME>' \
    -F to=recipient@example.com \
    -F subject="Hello there!" \
    -F text='Testing some Mailgun awesomeness!' \
    -F o:tag='September newsletter' \
    -F o:tag='newsletters'
See Tags for more information!
Re-Delivering a Previously-Sent Email
By default: emails sent through our APIs are stored for 72 hours. If you navigate to your Dashboard, check the Logs page and find a message sent within this time frame that you wish to resend, you should have a 'storage.url' field. Using that exact URL in your POST request, along with one or more 'to' parameters, you can deliver that MIME to the provided recipients:
curl -s --user 'api:YOUR_API_KEY' {{STORAGE.URL}} \
    -F to='bob@example.com, john@example.com'
Warning!
IP addresses for HTTP endpoints will change frequently and be subjected to change without notice. Be sure there are no IP-based ACLs that would prevent communication to new IP addresses that may be added or removed at any time.
Send via SMTP
First you'll need to grab your SMTP credentials. SMTP credentials are set and managed on a per-domain basis. You can view and modify them via our HTTP API
or through our UI by navigating on the sidebar to Sending -> Domain Settings, select your domain from the
dropdown, then select the SMTP Credentials tab. For more information please reference Can I Customize My SMTP Credentials?
Because SMTP is a widely adopted and standardized protocol, you can send emails using a wide variety of tools, libraries, and technologies—from command-line utilities like Swaks to programming languages, frameworks, and even basic telnet sessions.
The below examples will be using Swaks
# Swaks is the cURL equivalent for SMTP, install it first:
curl http://www.jetmore.org/john/code/swaks/files/swaks-20130209.0/swaks -o swaks
# Set the permissions for the script so you can run it
chmod +x swaks
# It's based on perl, so install perl
sudo apt-get -y install perl
# now send!
./swaks --auth \
       --server smtp.mailgun.org \
       --au YOUR-SMTP-USER \
       --ap YOUR-SMTP-PASSWORD \
       --to recipient@example.com \
       --h-Subject: "Hello" \
       --body 'Testing some Mailgun awesomness!'
Mailgun SMTP servers listen on ports 25, 465, 587, and 2525. Port 465 requires a TLS connection. Ports 25, 587, and 2525 require a non-TLS connection but may be upgraded to TLS using the STARTTLS command. We offer many different ports due
to some ISPs blocking / throttling certain SMTP ports.
Learn more about ports by reading our article, WHich SMTP Port Should I Use? Undertsanding Ports 25, 465,& 587.
| Port | Requirements |
|---|---|
25 |
Requires a non-TLS connection but may be upgraded to TLS using the STARTTLS command. |
465 |
Requires a TLS connection |
587 |
Requires a non-TLS connection but may be upgraded to TLS using the STARTTLS command. |
2525 |
Requires a non-TLS connection but may be upgraded to TLS using the STARTTLS command. |
Notes:
- Some ISPs are blocking or throttling SMTP port 25. Using port 587 is recommended.
- Google Compute Engine allows port 2525 for SMTP submission.
- An SMTP send will error with "Cannot parse to address" or "cannot parse from address" if the provided email address fails syntax checks in accordance with RFC5321, RFC5322, RFC6854 :::
IP addresses for SMTP endpoints will change frequently and be subjected to change without notice. Be sure there are no IP-based ACLs that would prevent communication to new IP addresses that may be added or removed at any time. :::
Passing Sending Options
When sending emails there are a variety of sending options to consider. See the table below:
-
For HTTP please use the specified
o:parameter, these are also found in our API documentation - For SMTP you must use the SMTP Headers below
| HTTP Option | SMTP Header | Description |
|---|---|---|
o:tag |
X-Mailgun-Tag |
The Tag string is used for aggregating stats. You can make a message with several categories by setting multiple X-Mailgun-Tag headers. |
o:dkim |
X-Mailgun-Dkim |
Enables/disables DKIM signatures on a per-message basis. Use yes or no |
o:testmode |
X-Mailgun-Drop-Message |
Enables sending in test mode. Note: Sending in Test Mode will not actually deliver an email but will emit a delivered event with a 650 status code Pass, yes, or no if needed. |
o:tracking |
X-Mailgun-Track |
Toggles tracking on a per-message basis. Pass, yes or no. |
o:tracking-clicks |
X-Mailgun-Track-Clicks |
Toggles clicks tracking on a per-message basis. It has a higher priority than the domain-level setting. Pass, yes, no, or htmlonly |
o:tracking-opens |
X-Mailgun-Track-Opens |
Toggles opens tracking on a per-message basis. It has a higher priority than the domain-level setting. Pass, yes or no |
o:sending-ip |
X-Mailgun-Sending-Ip |
Used to specify an IP Address to send an email that is owned by your account |
o:sending-ip-pool |
X-Mailgun-Sending-Ip-Pool |
If an IP Pool ID is provided, the email will be delivered with an IP that belongs in that pool |
o:require-tls |
X-Mailgun-Require-TLS |
Use this header to control TLS connection settings. If set, Mailgun will only deliver the message over a secure TLS connection with the ESP. If TLS is not available, the delivery will fail |
o:skip-verification |
X-Mailgun-Skip-Verification |
Use this header to control TLS (Transport Layer Security) connection settings. |
o:secondary-dkim |
X-Mailgun-Secondary-DKIM |
Specify a second domain key to sign the email with. The value is formatted as signing_domain,selector, e.g. example.com,s1. This tells Mailgun to also sign the message with the signing domain example.com using the selector s1. Note: the domain key specified must have been created and activated. |
o:secondary-dkim-public |
X-Mailgun-Secondary-DKIM-Public |
This header specifies an alias of the domain key specified in X-Mailgun-Secondary-DKIM. Also formatted as public_signing_domain/selector. The X-Mailgun-Secondary-DKIM header must also be provided if this header is used. Mailgun will sign the message with the provided key of the secondary DKIM, but use the public secondary DKIM name and selector. Note: We will perform a DNS check prior to singing the message to ensure the public keye matches the secondary DKIM |
o:deliverytime |
X-Mailgun-Deliver-By |
Use this to indicate the desired time of delivery. |
o:deliverytime-optimize-period |
X-Mailgun-Delivery-Time-Optimize-Period |
Toggles STO on a per-message basis. The string should be set to the number of hours in [0-9]+h format. |
o:time-zone-localize |
X-Mailgun-Time-Zone-Localize |
Toggles TZO on a per-message basis. The string should be set to the preferred delivery time in HH:mm or hh:mmaa format, where HH:mm is used for a 24-hour format without AM/PM, and hh:mmaa is used for 12-hour format with AM/PM. |
recipient-variables |
X-Mailgun-Recipient-Variables |
Use this header to provide a JSON dictionary of variables to substitute for Batch messages. |
template |
X-Mailgun-Template-Name |
Name for the template to be rendered as the message body. |
t:version |
X-Mailgun-Template-Version |
Optional: Version of the template to be used, if different from the current active template. |
v:key=value |
X-Mailgun-Variables |
If sending with a Template, the provided data will be treated as the values to substitute with the templates variables. Note that X-Mailgun-Template-Variables/t:variables will override these if also provided. If a template is not used, the provided data will be treated as metadata and appended to the user-variabled field in events / webhooks. NOTE: These variables are visible in the email MIME! |
t:variables |
X-Mailgun-Template-Variables |
A valid JSON-encoded dictionary used as the input for template variable expansion. See Templates docs for more information. Note: These variables will be preferred over X-Mailgun-Variables, e.g. user variables |
o:tracking-pixel-location-top |
X-Mailgun-Track-Pixel-Location-Top |
If you send long emails that experience truncation or other rendering issues at the recipient, you can ensure opens are being tracked accurately with placement of the tracking pixel at the top of your emails |
h:X-Mailgun-Suppress-Headers |
X-Mailgun-Suppress-Headers |
Removes the specified X-Mailgun header or all X-Mailgun headers if all is specified as the header value. Can be specified multiple times. |
Scheduling Delivery
Mailgun allows you to request a specific time for delivering messages.
Use o:deliverytime parameter if sending via the API. Use the MIME header X-Mailgun-Deliver-By when sending via SMTP.
Note:
If your billing plan supports 7 or more days of storage capability, you can now schedule emails out up to 7 days.
Sending with Send Time Optimization
Mailgun's Send Time Optimization (STO) feature uses machine learning to analyze engagement data (opens and clicks) for a recipient to determine when a user is most engaged with their messages. If there is enough engagement data to determine when the user is most engaged, Mailgun will hold onto the message and deliver it during that optimal period. The idea is to deliver the message to the recipient at a time when they are most likely to be engaged with their messages.
Sending an STO message via API and SMTP
- Send a message via API by passing the parameter: o:deliverytime-optimize-period
-
Send an SMTP message using the MIME header:
X-Mailgun-Delivery-Time-Optimize-Period
- The value should be a string in the [0-9] +h format. This format defines the window in which Mailgun will run optimization algorithm against the data that has been delivered to the message.
- Using a minimum value of 24h for best results, and the max value is 72h is highly recommended.
Note:
For more information on STO, see the article, What is Send Time Optimization?.
Sending a Message with Time Zone Optimization
Time Zone Optimization (TZO) allows senders to schedule messages to be delivered in a recipient's local time zone. TZO is like message scheduling, however, the focus is on passing the message on to the desired delivery time based on the recipient's local time zone.
Mailgun will convert the message to use the recipient's local time zone, when there is data present for the recipient. If Mailgun does not have data for that recipient, the message will be delivered immediately. :::
-
Time zones are based on a recipient's IP address
- Mailgun collects IP addresses on click events and uses a geo-location service to translate the IP address into a time zone for the user.
- The time zone is hashed and stored in a database, which Mailgun will look up for that user when a TZO message is sent.
Sending TZO message via API and SMTP
- Send a message via API by passing the parameter: o:time-zone-localize
-
Send a message via SMTP using a MIME header:
X-Mailgun-Time-Zone-Localize
- The value (String) should be set to the preferred delivery time in HH:mm or hh:mmaa format, where HH:mm is used for 24 hours format without AM/PM and hh:mmaa is used for 12-hour format with AM/PM.
Sending an AMP Message
Google's Accelerated Mobile Pages (AMP) for email is a web component framework that you can use to easily create user-first websites, stories, emails, and ads. The AMP email format provides a subset of AMPHTML components for use in email messages, that allows recipients of AMP emails to interact dynamically with content directly in the message. Mailgun allows senders to include AMP components within their email message(s) using the amp-html parameter.
This allows recipients to interact within the email message.
Some examples include:
- Answering surveys
- Replying to documents
- Viewing inventory in real-time
- Submitting updates
AMP Requirements
While AMP is a really exciting email tool, it takes a bit of setup before you can successfully send an AMP email message to your recipients.
Registration
Here's what you'll need to know to register:
- In order to send AMP emails to mailboxes that support it (Gmail for now), you’ll need to register your sending domain with Google. Click here to register.
Content
- Your AMP email content must comply with Google's requirements. Be sure to look at Google's Bulk Senders Guidelines before composing your email.
- AMP messages must follow the AMP for Email Specifications . Specifically, the required markup, AMP components, and CSS requirements.
- To ensure your content will pass the validation process, use Gmail's AMP for Email Playground
Note:
If you follow the AMP requirements set by Google, you should be well on your way to sending AMP messages.
HTTPS URLs
All URLs must use HTTPS, including tracking and unsubscribe URLs. If you're using Mailgun for your open/click tracking and unsubscribe UR:s, you'll need to Follow these steps to enable HTTPS on your Mailgun tracking URLs.
Sending AMP emails
Mailgun has made it easy to send an AMP email using our API by providing the optional amp-html parameter along with your AMP content. Mailgun will take care of building the proper text/x-amp-html MIME portion. As long as you’re following the AMP requirements set by Google, you should be well on your way to sending your AMP messages.
Testing your AMP email messages
Note:
You can build and test your AMP email messages even while you're waiting for Google to register your domain.
AMP Best Practices
- Visit your Gmail settings page ( GSuite users will need their admins to enable the Dynamic Email Option )
- Click the Dynamic Email section, check the box to Enable Dynamic Email .
- Click Developer Settings
- Enter your sending address in the field – This will whitelist your sending address.
- Click OK
Following the proper requirements and these steps for sending AMP messages will allow you to be able to receive an AMP email from your sending address to your Gmail account.
Send with Attachments
Adding attachments uses the 'attachment' parameter. This example attaches 2 files to the email:
curl -s --user 'api:YOUR_API_KEY' \
    https://api.mailgun.net/v3/YOUR_DOMAIN_NAME/messages \
    -F from='Excited User <postmaster@YOUR_DOMAIN_NAME>' \
    -F to=recipient@example.com \
    -F subject="Hello there!" \
    -F text='Testing some Mailgun awesomeness!' \
    -F attachment=@tps-report.txt \
    -F attachment=@cover-letter.txt
You can also use the 'inline' parameter to include inline files that are intended to be displayed in the message
itself (note the cid:email.jpg reference):
curl -s --user 'api:YOUR_API_KEY' \
    https://api.mailgun.net/v3/YOUR_DOMAIN_NAME/messages \
    -F from='Excited User <postmaster@YOUR_DOMAIN_NAME>' \
    -F to=recipient@example.com \
    -F subject="Hello there!" \
    -F inline=@email.jpg \
    --form-string html='<html><body><p>Hello from <img src="cid:email.jpg"/></p></body></html>'
Attaching Metadata to Messages
When sending messages, you can attach data for later retrieval. For instance, you can attach campaign or recipient identifiers to messages to help relate webhook payloads or events retrieved from mailgun back to marketing campaigns or individual recipients in your system.
It's important to note that when using variables, the X-Mailgun-Variables header will be included in the MIME of the delivered email. This means that recipients who receive emails when variables are used will be able to see the variables if they view the MIME headers.
Attaching Metadata to emails via API
If you are sending email via the HTTP API, you can attach data by providing a single or multiple form parameters via v: as shown in the example below.
v:first_name=John
v:last_name=Smith
v:my_message_id=123
The data provided will be included in the recipient's email via a header called X-Mailgun-Variables. Additionally, the data will also be available via webhook payloads and events returned from the events API. The data will be attached to these payloads via the user-variables field as a JSON map. For example:
 {
    "event": "delivered",
    "user-variables": {
        "first_name": "John",
        "last_name": "Smith",
        "my_message_id": "123"
    }
}
X-Mailgun-Variables substitutions with recipient-variables
When sending batches of emails, you can use values from recipient variables to provide a custom variable per recipient using templating.
For example, given a variable of v:recipient-id=%recipient.id% and a recipient variable of {"user1@example.com":{"id":123}}, events and webhooks associated with the recipient user1@example.com will contain a user-variable field with the content of {"recipient-id":"123"}
Attaching Metadata to emails via SMTP
When sending messages via SMTP, you can attach data by providing a X-Mailgun-Variables header. You can provide multiple X-Mailgun-Variables headers, their map values will be combined. The header data must be in JSON map format, as shown in the example below.
X-Mailgun-Variables: {"first_name": "John", "last_name": "Smith"}
X-Mailgun-Variables: {"my_message_id": 123}
Note:
The value of the "X-Mailgun-Variables" header must be a valid JSON string, otherwise Mailgun won't be able to parse it. If your "X-Mailgun-Variables" header exceeds 998 characters, you should use folding to spread the variables over multiple lines.
Batch Sending
Mailgun supports the ability to send to a group of recipients through a single API call, or SMTP session. This is achieved by:
-
Using Batch Sending by specifying multiple recipient email addresses as
toparameters and using Recipient Variables. - Using Mailing Lists with the Template Variables
Warning!
When using Batch Sending, it is important to also use Recipient Variables. This will ensure that Mailgun will send an individual to each recipient in the to field. If this is not done, the email will show all recipients emails in the to field for all recipients
Recipient Variables
Recipient Variables are custom variables that you define to allow the ability to send a custom message to each recipient while using a single API call (or SMTP session).
To access a Recipient Variable within your email, simply reference %recipient.yourkey%. For example, consider the following JSON:
{
  "user1@example.com" : {"unique_id": "ABC123456789"},
  "user2@example.com" : {"unique_id": "ZXY987654321"}
}
To reference the above variable within your email, use %recipient.unique_id%
Recipient Variables allow to:
- Submit a message template
- Include multiple recipients
- Include a set of key value pairs with unique data for each recipient
curl -s --user 'api:YOUR_API_KEY' \
    https://api.mailgun.net/v3/YOUR_DOMAIN_NAME/messages \
    -F from='Excited User <postmaster@YOUR_DOMAIN_NAME>' \
    -F to=alice@example.com \
    -F to=bob@example.com \
    -F subject="Hey %recipient.name%" \
    -F text='If you wish to unsubscribe, click <https://mailgun.com/unsubscribe/%recipient.id%>' \
    -F recipient-variables='{"alice@example.com": {"name":"Alice", "id":1}, "bob@example.com": {"name":"Bob", "id":2}}' \
The example above: Alice and Bob both will get personalized subject lines, "Hey, Alice", and "Hey, Bob", as well as unique unsubscribe links.
Note:
- The maximum number of recipients allowed for batch is 1,000
- Recipient variables should be set as a valid JSON-encoded dictionary where key is a plain recipient address, and value is a dictionary with variables.
When sent via SMTP, recipient variables can be included by adding the following header to your email:
X-Mailgun-Recipient-Variables: {"user1@example.com": {"unique_id": "ABC123456789"}}
Example:
X-Mailgun-Recipient-Variables: {"bob@example.com": {"first":"Bob", "id":1}, "alice@example.com": {"first":"Alice", "id": 2}}
From: me@example.com
To: %recipient%
Date: 29 Mar 2016 00:23:35 -0700
Subject: Hello, %recipient.first%!
Message-Id: <20160329071939.35138.9413.6915422C@example.com>
Content-Type: text/plain; charset="us-ascii"
Content-Transfer-Encoding: quoted-printable

Hi, %recipient.first%,
=20
Please review your profile at example.com/orders/%recipient.id%.
=20
Thanks,
Example.com Team
Note:
- The value of the "X-Mailgun-Recipient-Variables" header should be a valid JSON string, otherwise Mailgun won't be able to parse it.
- If your "X-Mailgun-Recipient-Variables" header exceeds 998 characters, you should use folding to spread the variables over multiple lines. :::
They can also be supplied through a special construct called a Variable Container.
To contain variables, create the following MIME construct:
multipart/mailgun-variables
--application/json (base64 encoded)
--message/rfc822
----original-message
In this construct, JSON will be Base64 encoded, and will be stored inside the part of the body which will handle recipient variables containing special characters.
Example:
Content-Type: multipart/mailgun-variables; boundary="8686cc907910484e9d21c54776cd791c"
Mime-Version: 1.0
From: me@example.com
Date: Thu, 26 Jul 2012 15:43:07 +0000
Message-Id: <20120726154307.29852.44460@definebox.com>
Sender: bob=bob-mg@definebox.com

--8686cc907910484e9d21c54776cd791c
Mime-Version: 1.0
Content-Type: application/json
Content-Transfer-Encoding: base64

eyJkZXNjcmlwdGlvbiI6ICJrbGl6aGVudGFzIn0=

--8686cc907910484e9d21c54776cd791c
Content-Type: message/rfc822
Mime-Version: 1.0

Date: Thu, 26 Jul 2012 19:42:55 +0400
To: %recipient.description% <support@mailgunhq.com>
From: me@example.com
Subject: (rackspace) Hello
 MSK 2012 support@mailgunhq.com %recipient.description%
Message-Id: <20120726154302.29322.40670@definebox.com>

support@mailgunhq.com %recipient.description%

--8686cc907910484e9d21c54776cd791c--
Mailing Lists
Mailing Lists are a great way to send to multiple recipients while using an email alias. When you use mailing lists, Mailgun will send a copy of the message to each subscribed member using the email alias. You can create and maintain your subscriber lists using the API or Control Panel. In addition, you can use Template Variables to create a unique message for each member of the mailing list.
Using Mailing Lists
- Create a mailing list email address (example: devs@example.com)
- Add member email addresses to the mailing list
- Each time you send a message using the mailing list email address (example: devs@example.com), a copy of the email is delivered to each subscribed member.
Managing a Mailing List
You can create Mailing Lists using the Mailing Lists tab in the Control Panel or through the API. To make it easier, Mailgun has support for a couple different formats to upload Mailing List members:
- You can upload a CSV file with the members.
- You can use a JSON array form parameter
- You can use form-like file upload
Creating a mailing list through the API:
curl -s --user 'api:YOUR_API_KEY' \
   https://api.mailgun.net/v3/lists \
   -F address='LIST@YOUR_DOMAIN_NAME' \
   -F description='Mailgun developers list'
Adding a single member through the API:
curl -s --user 'api:YOUR_API_KEY' \
    https://api.mailgun.net/v3/lists/LIST@YOUR_DOMAIN_NAME/members \
    -F subscribed=True \
    -F address='bar@example.com' \
    -F name='Bob Bar' \
    -F description='Developer' \
    -F vars='{"age": 26}'
Adding multiple members using the JSON array approach, you can either send a flat list of member addresses:
curl -s --user 'api:YOUR_API_KEY' \
    https://api.mailgun.net/v3/lists/LIST@YOUR_DOMAIN_NAME/members.json \
    -F members='["alice@example.com","bob@example.com"]'
Members added this way are implicitly set as subscribed.
Alternatively, you can provide the full JSON payload expected for a member for the same fine-grained control when adding a single member:
curl -s --user 'api:YOUR_API_KEY' \
    https://api.mailgun.net/v3/lists/LIST@YOUR_DOMAIN_NAME/members.json \
    -F members='[{"name": "Bob Bar", "address": "bar@example.com", "subscribed": true, "vars": "{}"}]'
Note the use of vars to attach a JSON dictionary with structured data to each member of the mailing list.
You can reference that data in the body of the message using Template Variables.
There are two modes available when adding a new member, strict and upsert.
- Strict will raise an error in case the member already exists.
- Upsert will update an existing member if it's already in the list or insert a new one.
Learn how to toggle between the modes and skip malformed addresses in the API documentation pages for the Mailing Lists API :::
Sending to a Mailing List
Sending to a Mailing List is as easy as using one of our APIs, HTTP or SMTP, and sending an email to the address created for the Mailing List as the recipient.
You can set the access level on Mailing Lists to:
- Only allow the administrator to post to the list (limited to an API call or authenticated SMTP session)
- Allow Mailing List members to post to the list
- Allow anybody to post to the list
Replying to a Mailing List
You can set the preferred method to where a reply to the list should go:
-
listReplies to the list go to the list address. This is the default setting for any new list created, except for read-only lists, where replies can only go to the sender. Reply-all will still go to the list. -
senderReplies to the list going to the sender (FROM) address. This is the default and the only option for read-only lists.
Template Variables
There are some pre-defined variables you can use to personalize your message to each recipient.
| Header | Description |
|---|---|
%recipient% |
Full recipient spec, like “Bob bob@example.com” (for using as value for “To” MIME header). |
%recipient_email% |
Recipient’s email address, like bob@example.com. |
%recipient_name% |
Recipient’s full name, like “John Q. Public”. |
%recipient_fname% |
Recipient’s first name. |
%recipient_lname% |
Recipient’s last name. |
%unsubscribe_url% |
A generated URL which allows users to unsubscribe from messages. |
%mailing_list_unsubscribe_url% |
A generated URL which allows users to unsubscribe from mailing lists. |
%unsubscribe_email% |
An email address which can be used for automatic unsubscription by adding it to List-Unsubscribe MIME header. |
%recipient.yourvar% |
Accessing a custom datavalue. (see Attaching Data to Messages) |
Unsubscribing
To manage unsubscribes in Mailing Lists, you can use %mailing_list_unsubscribe_url%. Mailgun will generate a unique link to unsubscribe from the mailing list. Once a recipient clicks on the unsubscribe link. The recipient is marked as "unsubscribed" from this mailing list and won't get any further emails addressed to this list.
Note:
You can still override the "unsubscribe" setting via the API or the Control Panel (in case of user error or accidental unsubscribe). You can also manually unsubscribe to the customer without using any links via the API or the Control Panel. Read more in the Mailing Lists API section.
Mailing Lists and Routes
Mailing lists work independently from Routes. When there is a Mailing List or Route with the same address, the incoming message will hit the Route and Mailing List simultaneously. This can be convenient for processing replies to the Mailing List and integrating into things like forums or commenting systems.
Templates
Mailgun allows you to store predefined templates via the Template API and use them to send messages via the Sending API by providing the template name. Each domain allows for a maximum of 100 templates. Each template can have up to 10 versions.
To learn more about templates and how to use them, see the article: What's Up with Mailgun Templates?
To send a message using the template feature:
First, you must create a template. You can do this via the Template API, or via our Template Builder in our UI.
curl -X POST -s --user 'api:YOUR_API_KEY' \
    https://api.mailgun.net/v3/YOUR_DOMAIN_NAME/templates \
    --form-string template='<div class="entry"> <h1>{{title}}</h1> <div class="body"> {{body}} </div> </div>' \
    -F name='template.test' \
    -F description='Sample template'
The response returns stored template information:
{
  "template": {
     "createdAt": "Wed, 29 Aug 2018 23:31:13 UTC",
     "description": "Sample template",
     "name": "template.test",
  },
  "message": "template has been stored"
}
The template is now ready to use for sending messages:
curl -s --user 'api:YOUR_API_KEY' \
    https://api.mailgun.net/v3/YOUR_DOMAIN_NAME/messages \
    -F from='Excited User <postmaster@YOUR_DOMAIN_NAME>' \
    -F to=recipient@example.com \
    -F subject='Hello there!' \
    -F template="template.test" \
    -F t:variables='{"title": "API documentation", "body": "Sending messages with templates"}'
If you are sending a MIME, you can instead pass template variables via the X-Mailgun-Template-Variables header.
Note:
Values can be defined via the v: option or X-Mailgun-Variables in your templates. However, if you do so, the variables are included in the delivered message via the X-Mailgun-Variables header. If this is not desired, use the t:variables option or X-Mailgun-Template-Variables header instead.
Handlebars
Mailgun's templates use a fork of the template engine, Handlebars. To provide values for substitution, please refer to attaching metadata to messages.
One of the easy ways to implement dynamic content in your template is to use Handlebar's Block Helpers. Mailgun's implementation of Handlebars supports the following block helpers: if, unless, each, with, equal.
The conditions will be determined by the JSON data you pass to the t:variables parameter, just like the rest of your template variables.
The if block helper
The if block helper will allow you to conditionally render a block in your template. For examples, if you wanted to use a template that would dynamically change language body, you would include the following in your HTML:
{{#if english}}
<p>This text is in the English language.</p>
{{else if spanish}}
<p>Este texto está en idioma español.</p>
{{else if french}}
<p>Ce texte est en langue française.</p>
{{/if}}
In order to send the spanish version, for example, you would pass the t:variables parameter with the following JSON data:
{"spanish" : "true"}The unless block helper
The unless block helper is essentially the inverse of the if helper. The block will only be rendered if the expression returns a false value. Include the following in your HTML:
{{#unless paid}}
<h3 class="warning">WARNING: Your account is past due and will be suspended shortly. Please contact our billing department for assistance</h3>
{{/unless}}
And example JSON payload would like this this:
{"paid" : "false"}The each block helper
When using the each helper, you can iterate a list. Iclude the following HTML:
{{#each user.services}}
<li>You scheduled {{this.service}} on {{this.date}}</li>
{{/each}}
Your JSON data could look something like this:
{
 "user":
 {
    "services":
    [
       {
          "date":"07/30/2019",
          "service":"deliverability consultation"
       },
       {
          "date":"08/05/2019",
          "service":"sales consultation"
       }
    ]
 }
}
The email would end up looking like this:
- You scheduled deliverability consultation on 07/30/2019
- You scheduled sales consultation on 08/05/2019
The equal helper
The equal helper renders a block if the string version of both arguments are equals. For example, if you include the following in your HTML below:
<p>{{#equal foo "bar"}}foo is bar{{/equal}}</p>
<p>{{#equal foo baz}}foo is the same as baz{{/equal}}</p>
<p>{{#equal nb 0}}nothing{{/equal}}</p>
<p>{{#equal nb 1}}there is one{{/equal}}</p>
<p>{{#equal nb "1"}}everything is stringified before comparison{{/equal}}</p>
Then pass the h:X-Mailgun-Variables parameter with the following JSON data:
{"foo": "bar", "baz": "bar", "nb": 1}The resulting email would end up looking like this:
foo is bar
foo is the same as baz
there is one
everything is stringified before comparison
A common gotcha with Templates
If you send an email with, only, a text/plain body and use the X-Mailgun-Template-Name header: this will not result in a template-rendered email. text/plain bodies are, typically, what you get when you send with Swaks!
To get around this issue, add the correct Content-Type header accordingly:
--add-header 'Content-Type: text/html; charset="utf-8"'You do not have to add this header explicitly via the HTTP API!
Sending an email in test mode
You can send messages in test mode by setting the o:testmode parameter to true. When you do this, Mailgun will accept and validate the message but will not send it. This is useful for testing ingesting the email, validating your domain, etc without actually sending the email out to an email inbox.
Note:
You are charged for messages sent in test mode!
Email Authentication
DKIM Rotation
DKIM rotation is the practice of regularly updating cryptographic keys used for signing emails to maintain security and protect against key compromise. Just like with passwords, your DKIM key is vulnerable to compromises, and best practices state that you should rotate your DKIM key at least every 6 months, and immediately if your key is compromised.
When you set up an authenticated domain, Mailgun provides two methods for rotating your key: • Automatic, using our Automatic Sender Security feature. • Manual
Automatic Sender Security
Mailgun's Automatic Sender Security feature simplifies email authentication by handling the technical setup and configuration automatically. This eliminates the need for manual key generation and DNS record adjustments, reducing errors and ensuring proper email authentication. It works by adding two CNAME records to your domain's DNS settings. These records delegate DKIM management to Mailgun, allowing automated rotation of your DKIM keys on a regular schedule. This approach enhances your email security, reduces manual maintenance, and ensures your authentication remains up to date without any ongoing effort on your part.
The host or name that you will provide your DNS provider will look something like pdk1._domainkey.my.domain.com and pdk2._domainkey.my.domain.com, while the target where you point back to Mailgun will look something like pdk1._domainkey.9d876.dkim1.mailgun.com and pdk2._domainkey.9d876.dkim1.mailgun.com.
Automatic Sender Security will generate two 2048 bit DKIM selector records via TXT records, which are automatically rotated every 120 days by default. You can adjust the rotation period if you'd like. The minimum interval for rotation is 5 days.
New Sending Domain
When adding a new domain, you will have the option to use Automatic Sender Security.
Existing Sending Domains
If you have an existing sending domain already utilizing DKIM via a TXT record and want to switch to using Automatic Sender Security, this is possible from the DNS records page on the Mailgun application.
Manual DKIM Rotation
You have the option to manually rotate your DKIM keys on your own schedule. Mailgun allows for signing messages with up to 3 DKIM keys. If multiple active keys are present on a sending domain, we use a round-robin method for determining which key is used to send the message.
There are 2 methods for adding a new DKIM key. In either case you'll want to choose a unique selector (must be unique to the sending domain). • Allow Mailgun to generate the DKIM key (Most common method) • Import an existing key via a valid PEM file (Advanced method)
When rotaing DKIM keys, you'll need to update the DNS records showing in your Domain Settings page. Also, due to DNS caching, it may take up to 10 minutes or more (depending on DNS cache settings) for DKIM keys to rotate into use.
Allowing Mailgun to generate the DKIM
You can choose to allow Mailgun to generate the DKIM key (most users will choose this method) In this case, you can choose the DKIM key length, either 1024 bit or 2048 bit. 2048 bit is more secure but can be a bit more complicated to setup as the record length is much longer, and DNS providers require you to split the record into 2 parts.
In the case of a key rotation or an upgrade from a 1024 bit key to a 2048 bit key, it is recommended to send a test message to yourself to verify messages are being signed with the new key (you may need to send several test messages), and then delete the old key.
Learn more on DKIM key rotation
Message Queue
The queuing algorithms are one of the most important features of Mailgun. If you try sending bulk mailings all at once, most ISPs will block you. Mailgun will put your messages in a message queue when you submit them for delivery.
-
A large number of messages can be submitted.
- Mailgun will automatically queue for the delivery in compliance with the receiving domains' guidelines and maximum sending rate optimized for each ESP (email service provider), such as Yahoo, Gmail, etc.
-
The messaging queue is dynamic.
- Your messages may take longer at first, however, your sending rates will increase the more you send messages.
- As your reputation grows, your sending rate will grow too.
Note:
Note: It is important to make sure you are sending quality traffic to ensure sending rates.
It is important to gradually increase your sending rates according to many factors, including:
- Consistency of traffic
- IP address sending history
- Domain reputation.
